Integrate PlayFab in Unity
Learn how to integrate PlayFab backend and Openfort with your game
Overview#
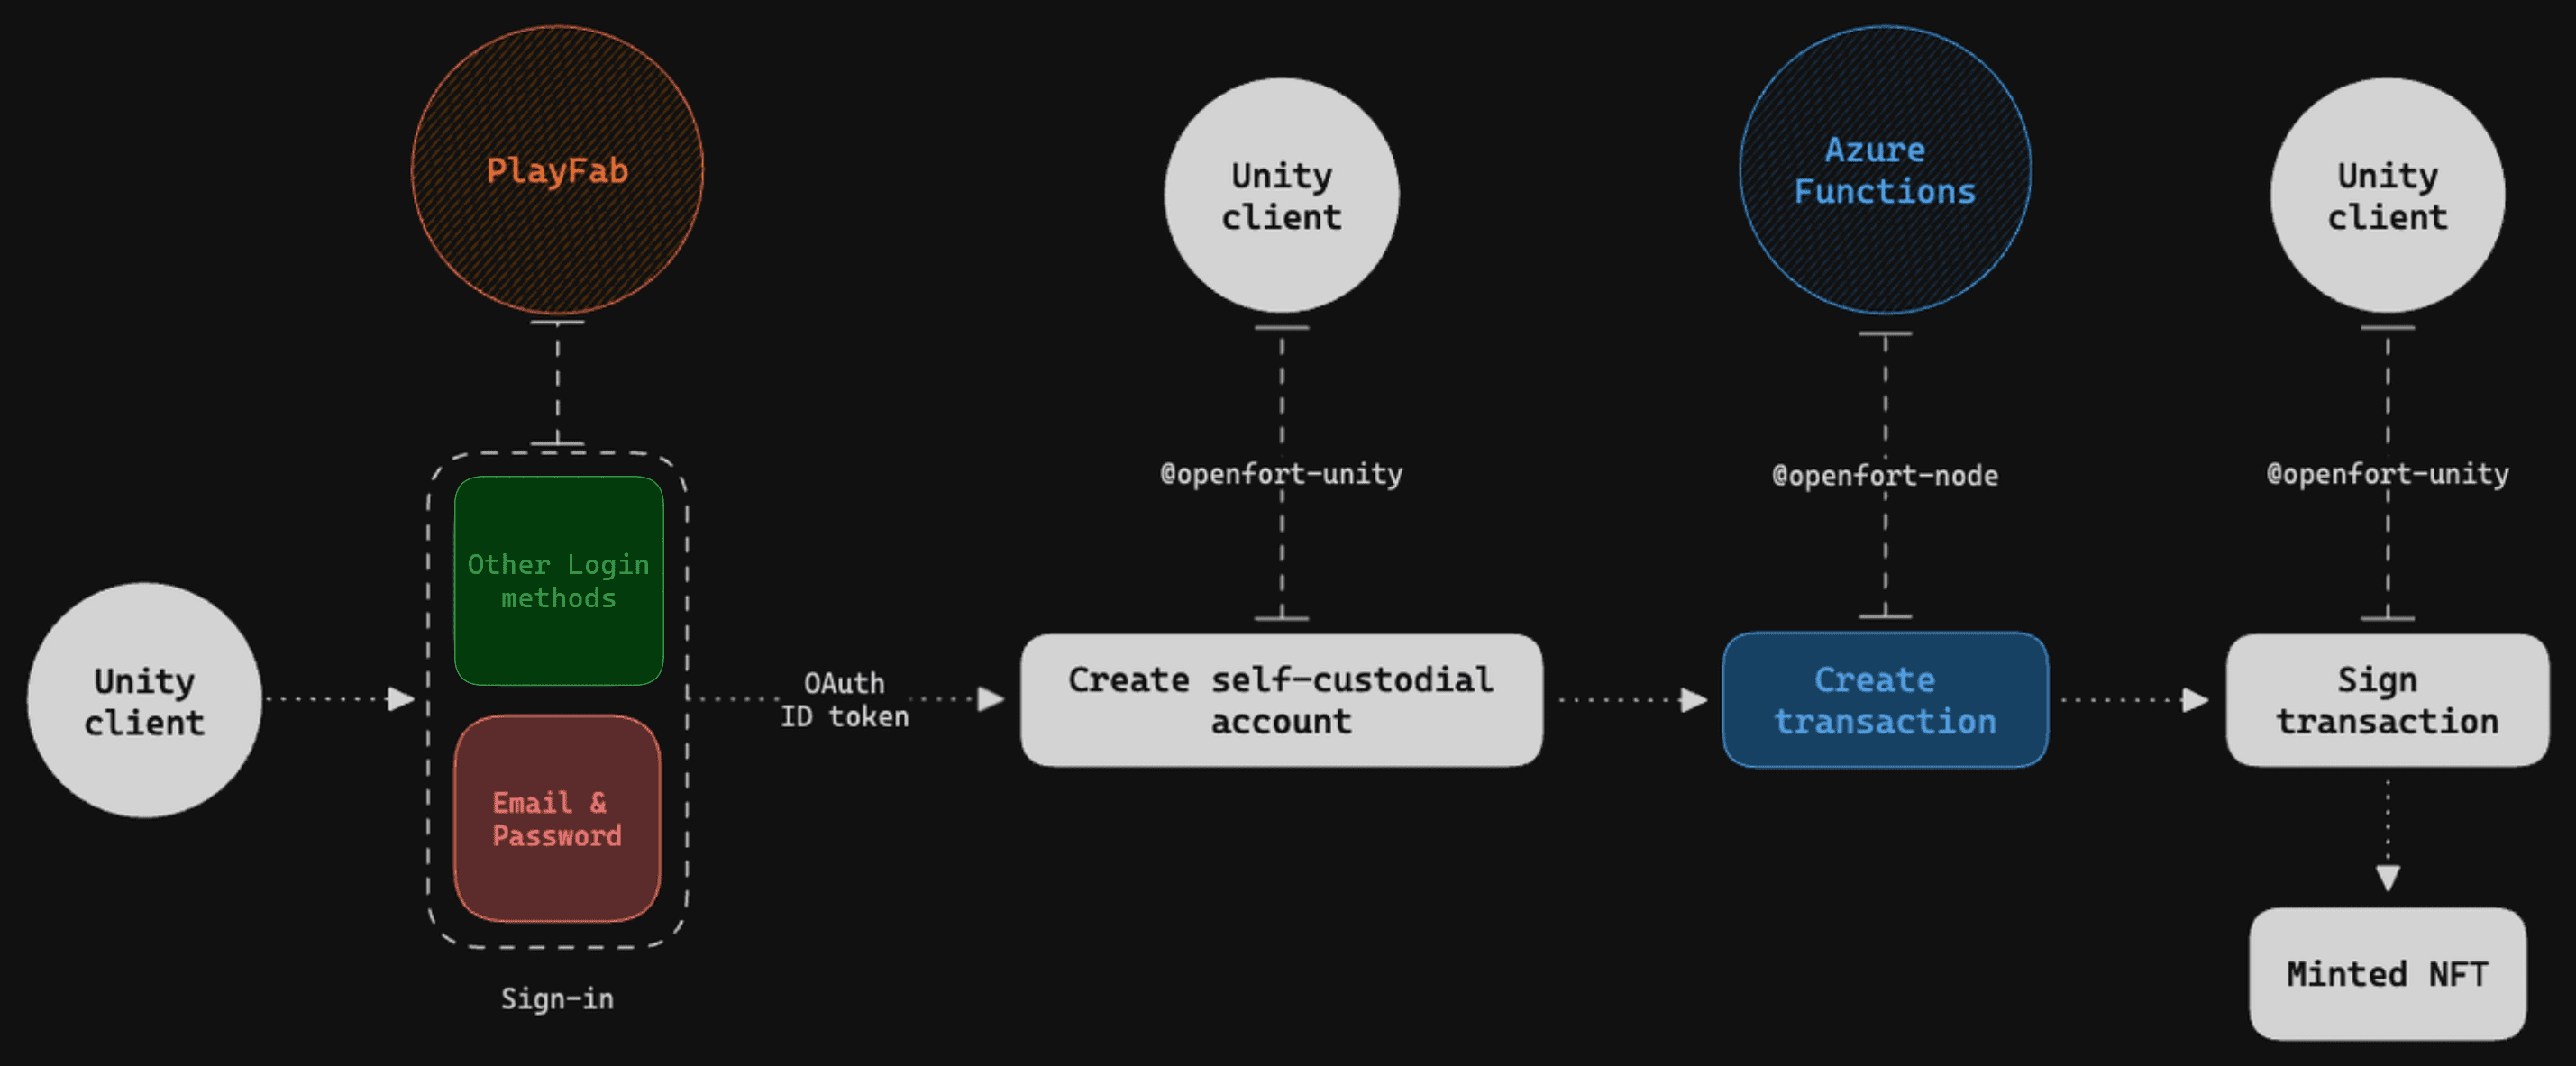
PlayFab is a backend service provided by Microsoft for game developers, offering tools for live game management, all powered by Azure's cloud infrastructure.
In this sample we use PlayFab's email & password authentication method to register a new user or log in with an existing one. Once authenticaded we use PlayFab's user identity token to create a non-custodial account using Embedded Smart Accounts.
Moreover, by integrating the Openfort SDK into Azure Functions, we establish a seamless connection to PlayFab. Unity clients using the PlayFab Unity SDK can tap into these functions, accessing the full range of Openfort features within the game environment.
Application Workflow#
Prerequisites#
- Create a PlayFab account and title
- Set up your Azure development environment:
- Sign in to dashboard.openfort.xyz and create a new project
- Download or clone the sample project:
- Open unity-client with Unity
- Open azure-backend with VS Code
Set up Openfort#
-
Add PlayFab as a provider
Add your PlayFab title and choose Save:

-
Create Shield Keys
In order to create secure non-custodial accounts for our players, we need to create Shield Keys:

After the creation, it's very important you save Shield Encryption Share Key, you will need it later:

-
Add a Contract
This sample requires a contract to run. We use 0x51216BFCf37A1D2002A9F3290fe5037C744a6438 (NFT contract deployed in Sepolia - 11155111). You can use the same to ease up things:

-
Add a Policy
We aim to cover gas fees for users. Set a new gas policy:

Now, add a rule to make our contract benefit from it:

Deploy Azure Backend#
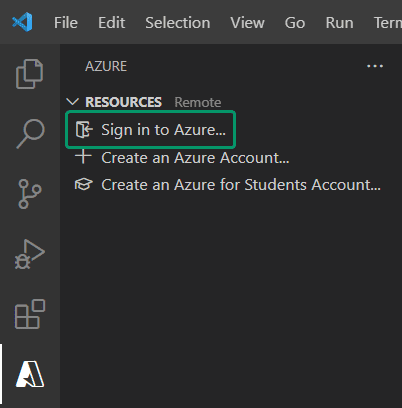
Open azure-backend with VS Code and sign in to Azure:
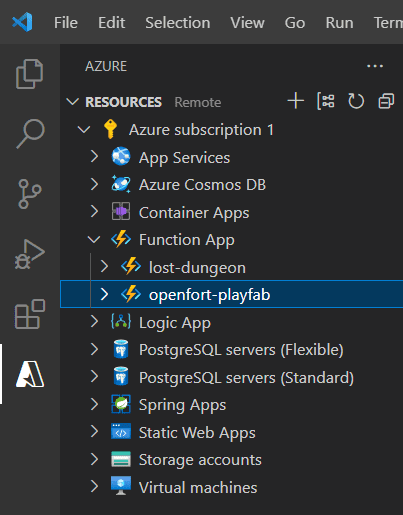
Ensure your Function App (here, it's "openfort-playfab") is listed:
In the terminal, run:
_10npm install
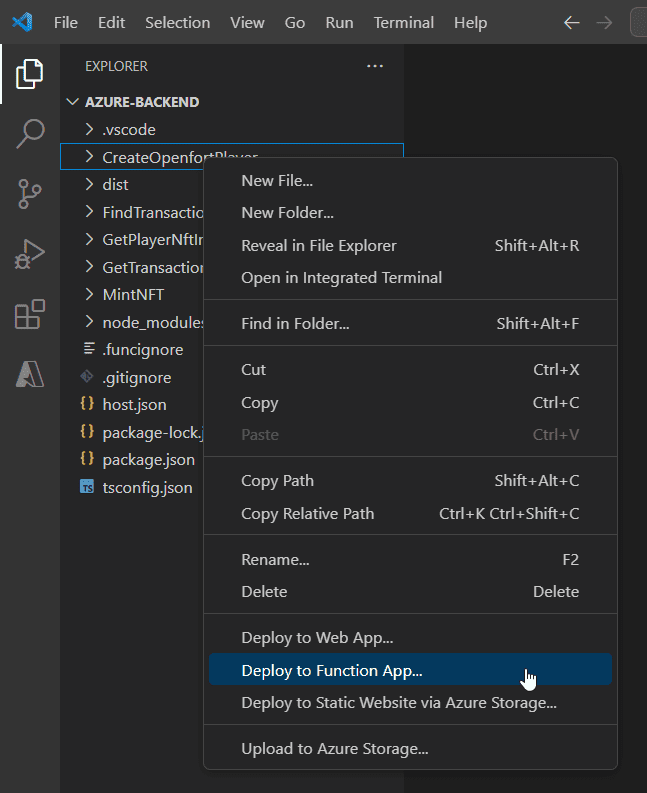
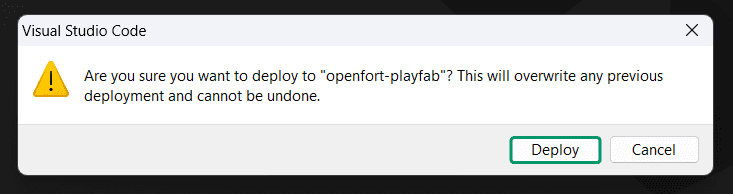
In the explorer, right-click on a function and select Deploy to Function App:
Next, choose your Function App:

Then, click on Deploy:
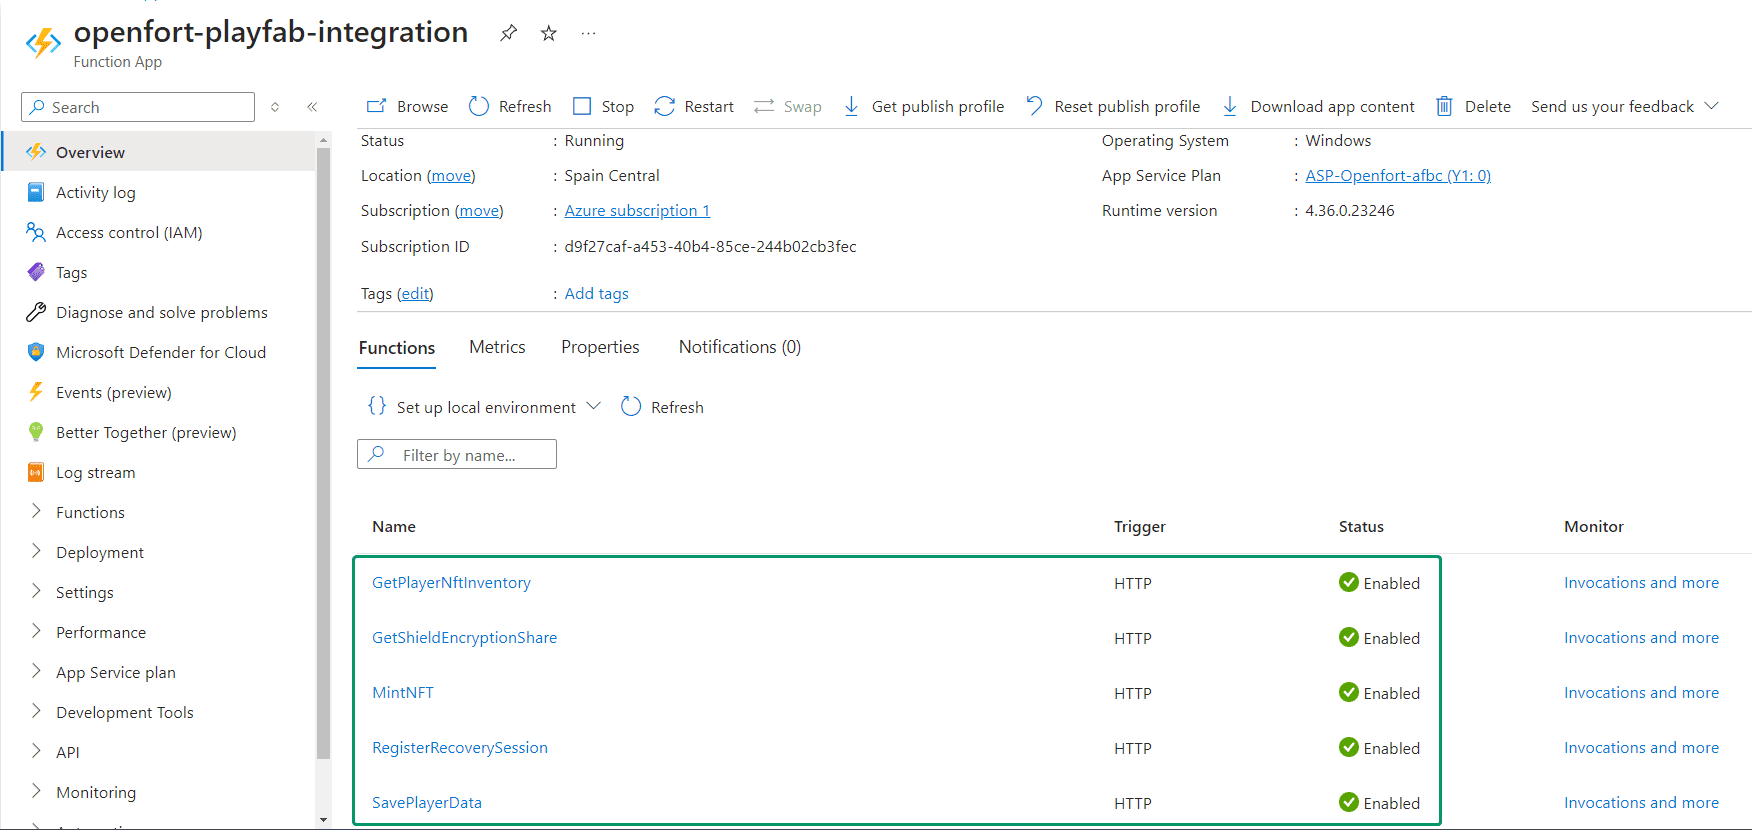
Navigate to your Azure Portal and open your Function App. You should see all the functions listed:
Click on any function and select Get Function Url:
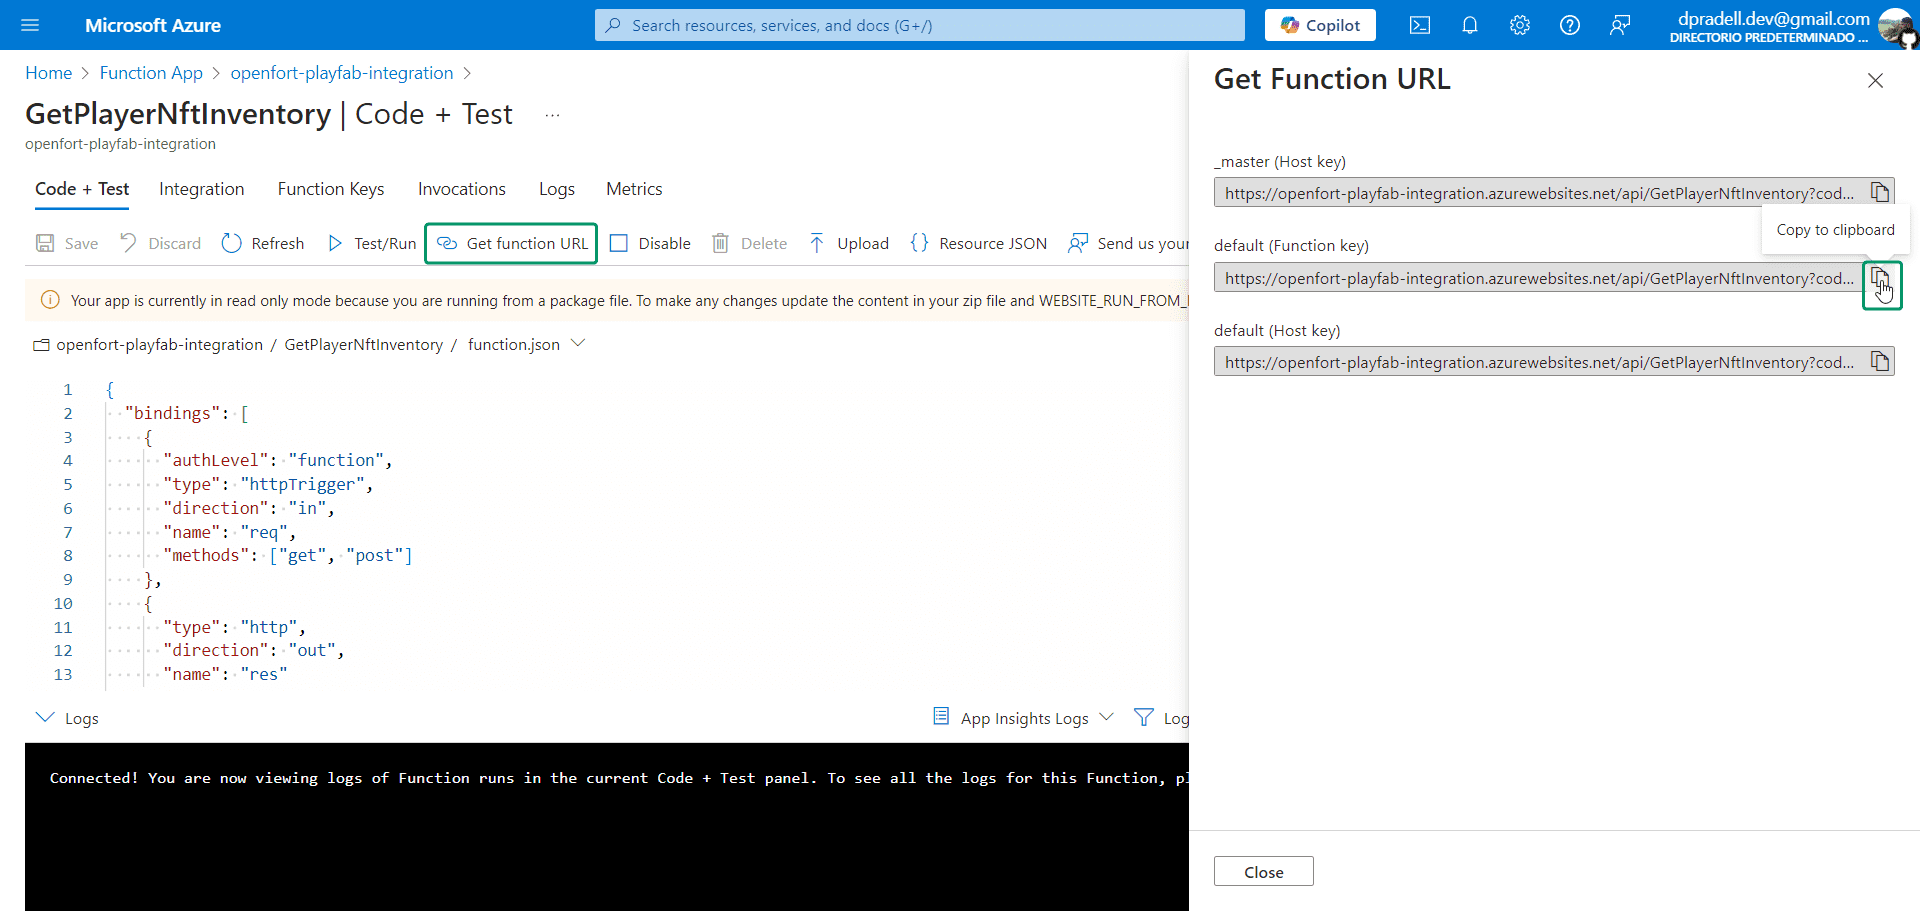
Subsequently, add this URL (along with all others) to PlayFab to enable access to our Azure Functions from within PlayFab.
Set up PlayFab Title#
-
Register Azure Functions
Visit the PlayFab developer dashboard, choose your title, and click on Automation:

Our functions are already registered. To do the same, click Register function and provide the function name along with its URL:

Repeat this for all deployed functions.
Set up Azure Backend#
Our Azure backend requires environment variables from both PlayFab and Openfort. Let's configure them.
-
Add Openfort Environment Variables
- Navigate to the Azure Portal and select your Function App.
- Under Settings --> Environment variables, click Add:

-
Provide the following details:
- Name:
OF_API_KEY - Value: Retrieve the API Secret key
- Name:
-
Add another application setting:
- Name:
OF_SHIELD_PUB_KEY - Value: Retrieve the Shield Publishable Key
- Name:
-
Add another application setting:
- Name:
OF_SHIELD_SECRET_KEY - Value: Retrieve the Shield Secret Key
- Name:
-
Add another application setting:
- Name:
OF_SHIELD_ENCRYPTION_SHARE - Value: It's the Shield Encryption Share Key you saved before.
- Name:
-
Add another application setting:
- Name:
OF_NFT_CONTRACT - Value: Retrieve the Contract API ID
- Name:
-
Add another application setting:
- Name:
OF_SPONSOR_POLICY - Value: Retrieve the Policy API ID
- Name:
-
And another application setting:
- Name:
OF_CHAIN_ID - Value: 11155111
- Name:
-
Add PlayFab Environment Variables
-
Visit the PlayFab developer dashboard, select your title, and navigate to Settings wheel --> Title settings:

-
In the API Features section, copy your Title ID:

-
Under Secret Keys, note down your Secret key:

-
Return to the Azure Portal and choose your Function App.
-
Under Settings --> Environment variables, click Add:
- Name:
PLAYFAB_TITLE_ID - Value: [Your Title ID]
- Name:
-
Add another application setting:
- Name:
PLAYFAB_SECRET_KEY - Value: [Your Secret Key]
- Name:
-
After adding all the environment variables, your configuration panel should look like the following. Confirm your changes by clicking Save:

Set up Unity Client#
This Unity sample project is already equipped with:
To begin, open unity-client with Unity:
-
Configure PlayFab SDK
- Navigate to the Project tab.
- Search for
PlayFabSharedSettingsand input your PlayFab Title ID:

-
Configure Openfort SDK
- Open the Login scene and add the API Publishable Key and the Shield Publishable Key to the OpenfortController config section:

Test in Editor#
Play Login scene, opt for Register, provide an email and password, then click Register again. This scene should appear:
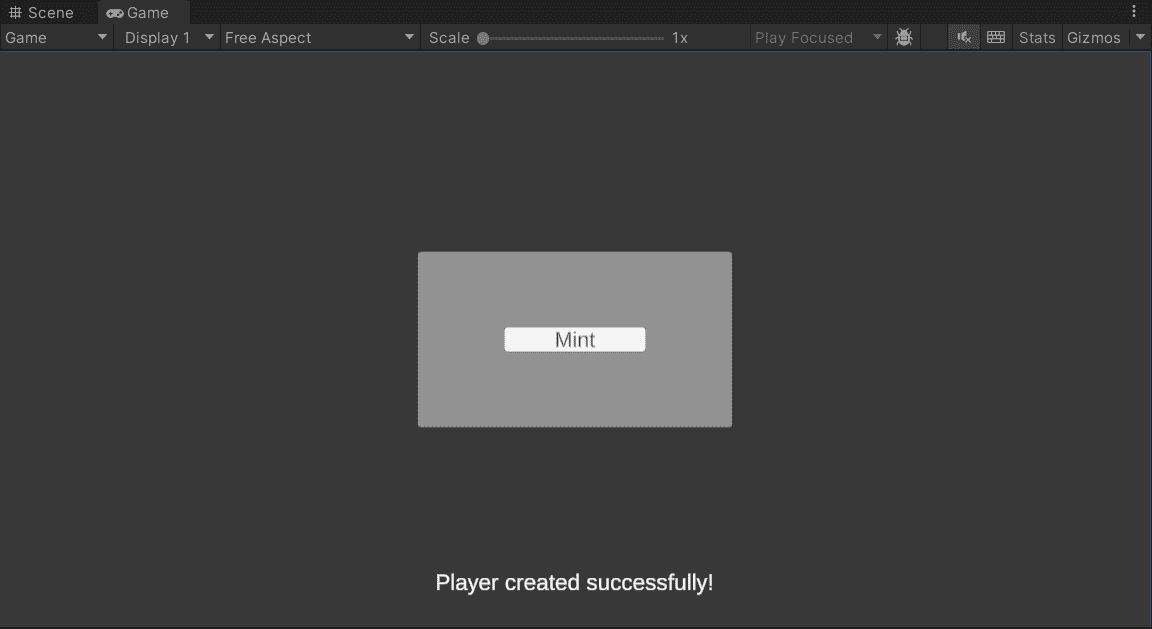
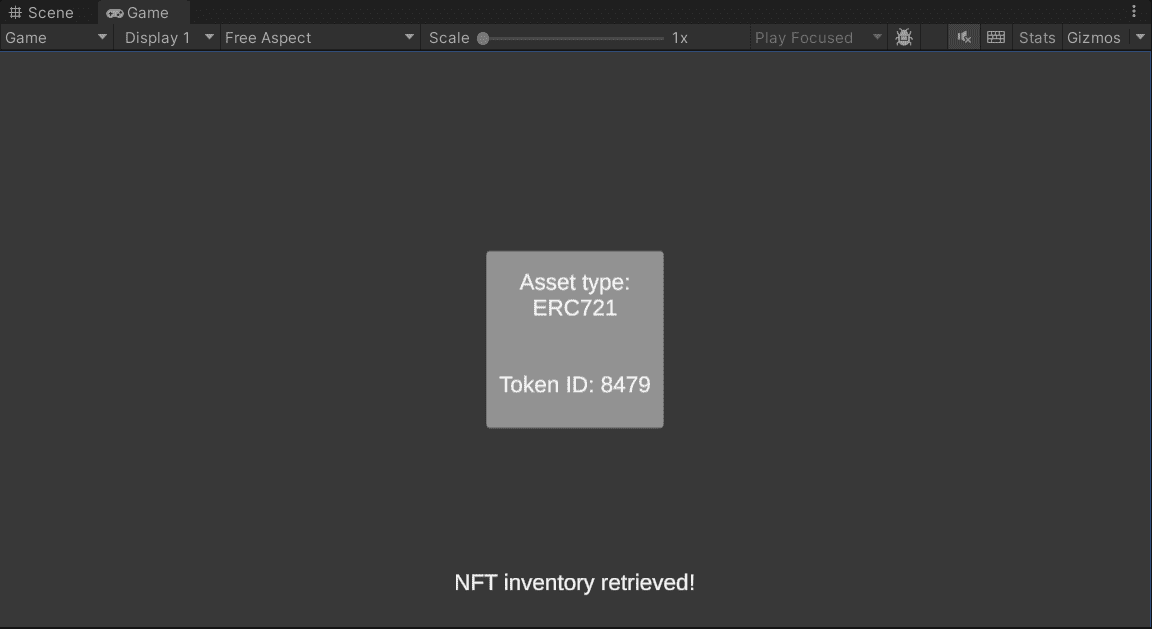
Select Mint. After a brief period, you should see a representation of your newly minted NFT:
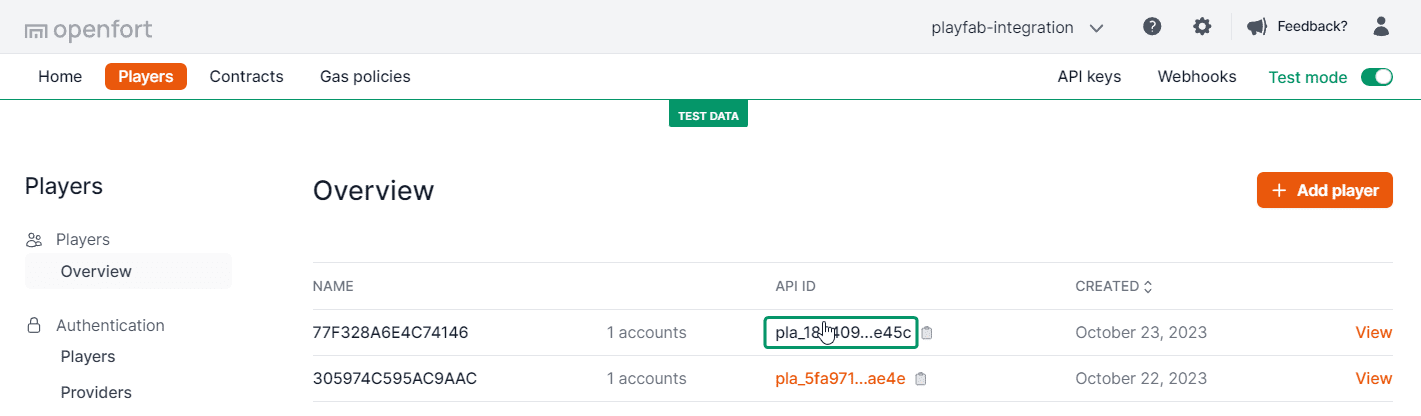
In the Openfort Players dashboard, a new player entry should be visible. On selecting this player:
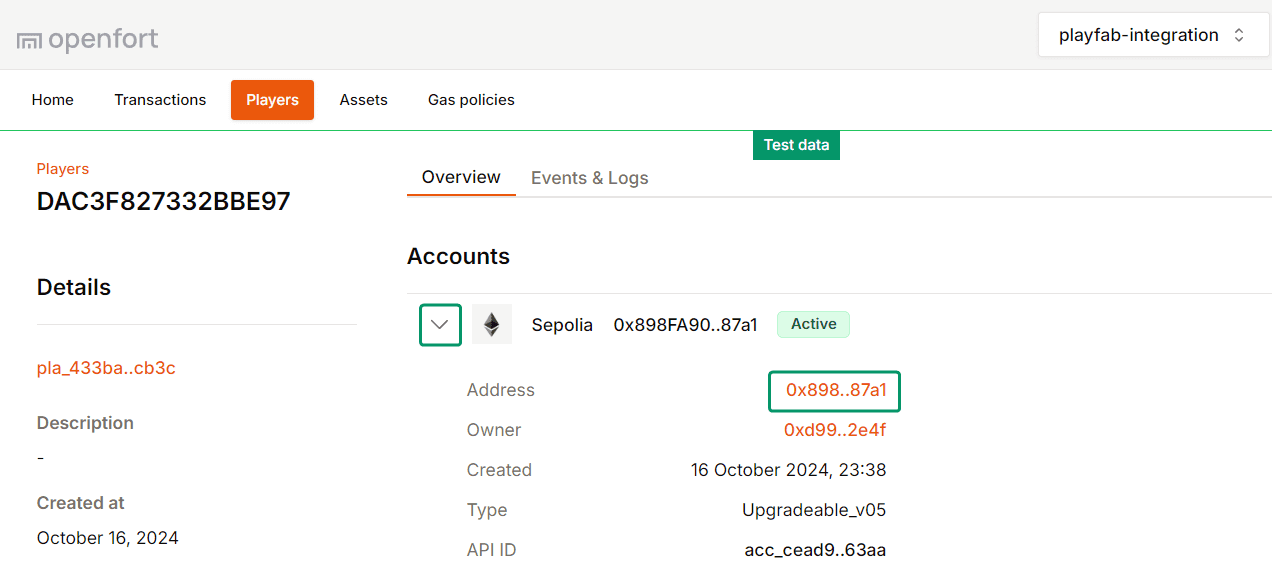
You'll notice that a mint transaction has been successfully processed:

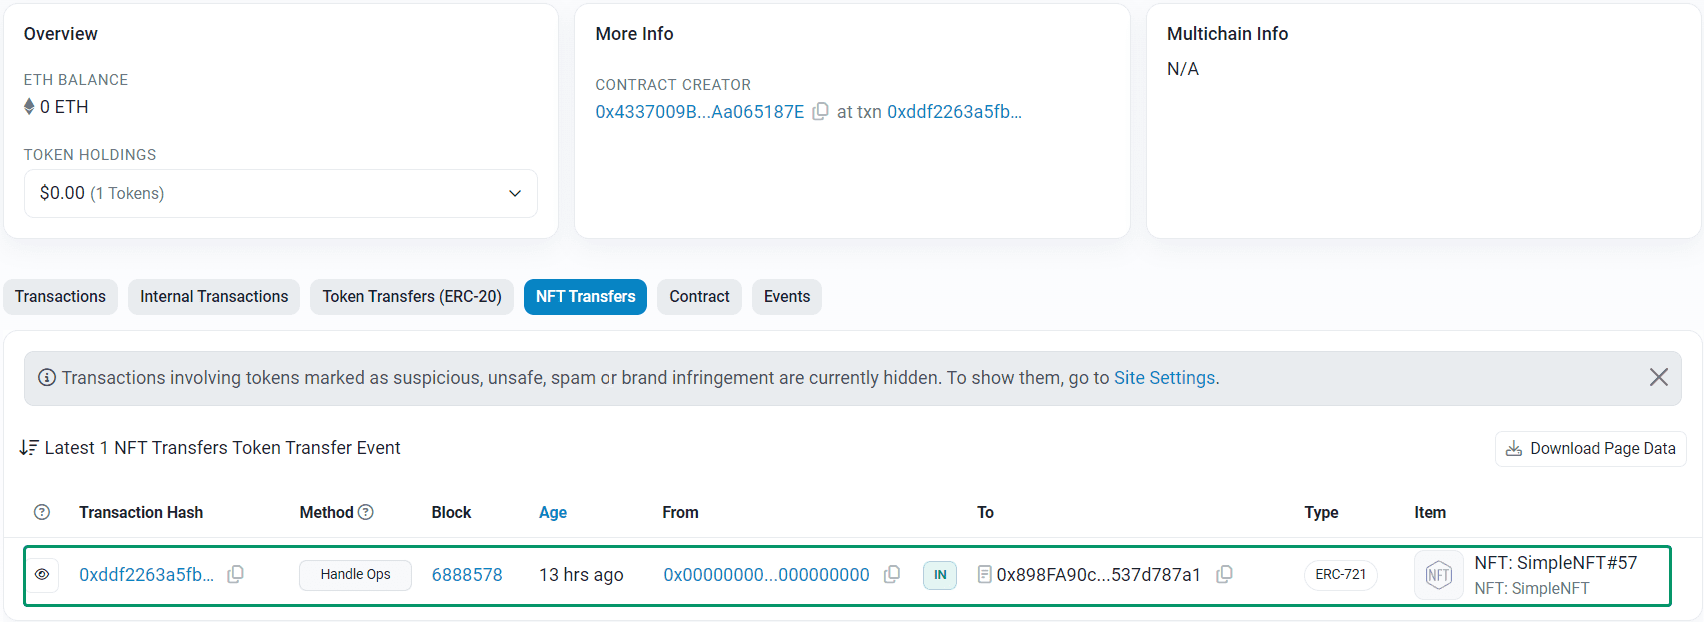
Additionally, by choosing your Sepolia Wallet Address, the explorer will open and by selecting NFT Transfers tab you'll see the transaction is further confirmed:
Conclusion#
Upon completing the above steps, your Unity game will be fully integrated with Openfort and PlayFab. Always remember to test every feature before deploying to guarantee a flawless player experience.
Get support#
If you found a bug or want to suggest a new [feature/use case/sample], please file an issue.
If you have questions, comments, or need help with code, we're here to help:
- on Twitter at https://twitter.com/openfortxyz
- on Discord: https://discord.com/invite/t7x7hwkJF4
- by email: support+youtube@openfort.xyz